Getting Started with Change Detection
To get started using change detection, you will need to create a scene for change detection. Unlike object detection a scene consists of two images. To create a scene you must have uploaded the target images to HUNTR from the OBJECT DETECTION: ORCA HUNTR - SCENES view.
Revisit step 1. in Getting Started with HUNTR Object Detection for instructions on how to upload imagery to HUNTR.
-
Create a scene:
-
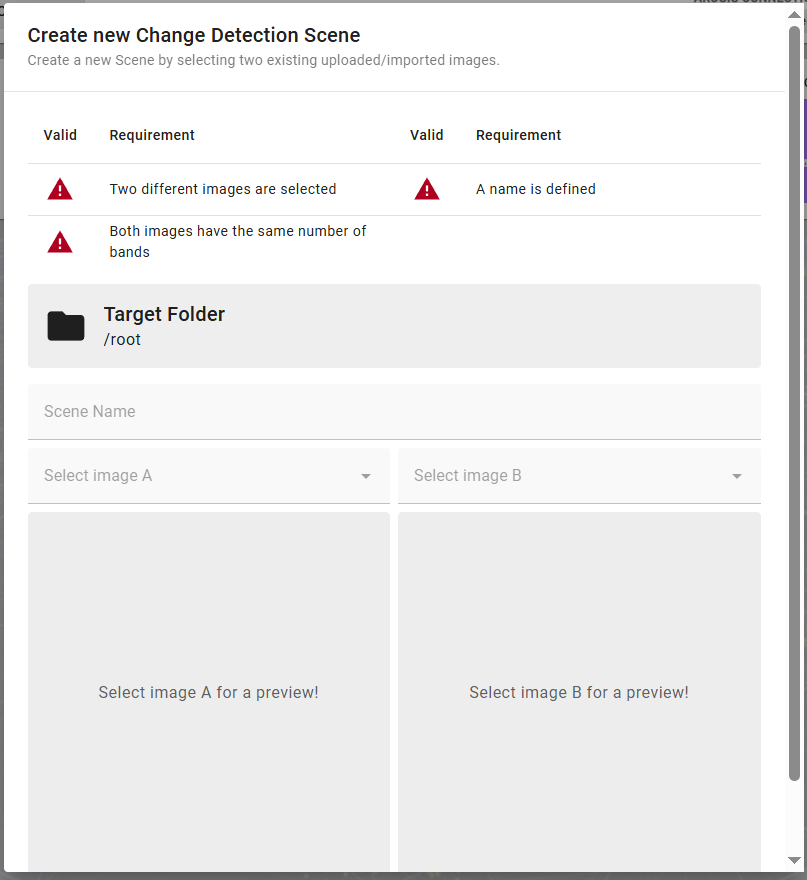
Click the ADD SCENE button in the upper right-hand corner of the ORCA HUNTR CD - SCENES view. A dialog box will open from which you can create a change detection scene. The imagery chosen must adhere to the imagery requirements.
-
Give the new scene a name and choose the two scenes for the pair from the drop-down lists for image A and image B.
-
When the requirements are satisfied, click CONFIRM to create the scene.
Create a scene
Note
If the georeferenced imagery overlaps but not entirely, only the overlapping section will be used for the scene creation.
-
-
Create an AI model:
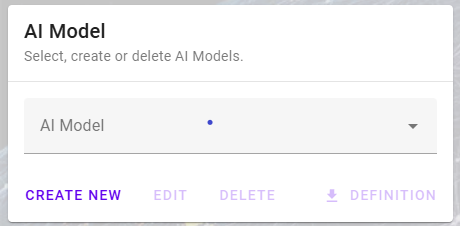
- Enter the ORCA HUNTR - MAP view by clicking on a scene. Under AI Model on the left sidebar, click CREATE NEW. Models created in HUNTR will be shared between all users on the HUNTR subscription account for your organization. Models created by one user can be used for detection but not trained or changed by others.
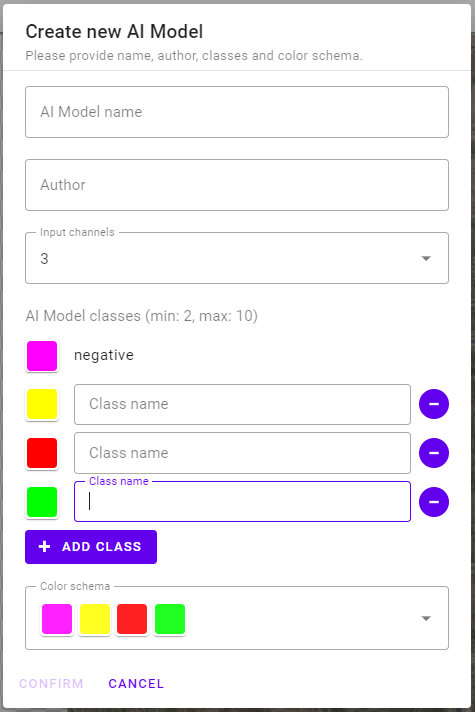
Click CREATE NEW - Give your model a name and state the author.
- Pick from one of the predefined color schemes and add your detection classes. You will need to define at least one class and up to 10 classes are supported.
- Click CONFIRM when done.
Create your first model -
Create a training area:
- First, choose the TRAINING AREA button above the scene.
- Find an area on the scene you would like to label and click to create a training area.
- A training area will be created on the same place in both images.
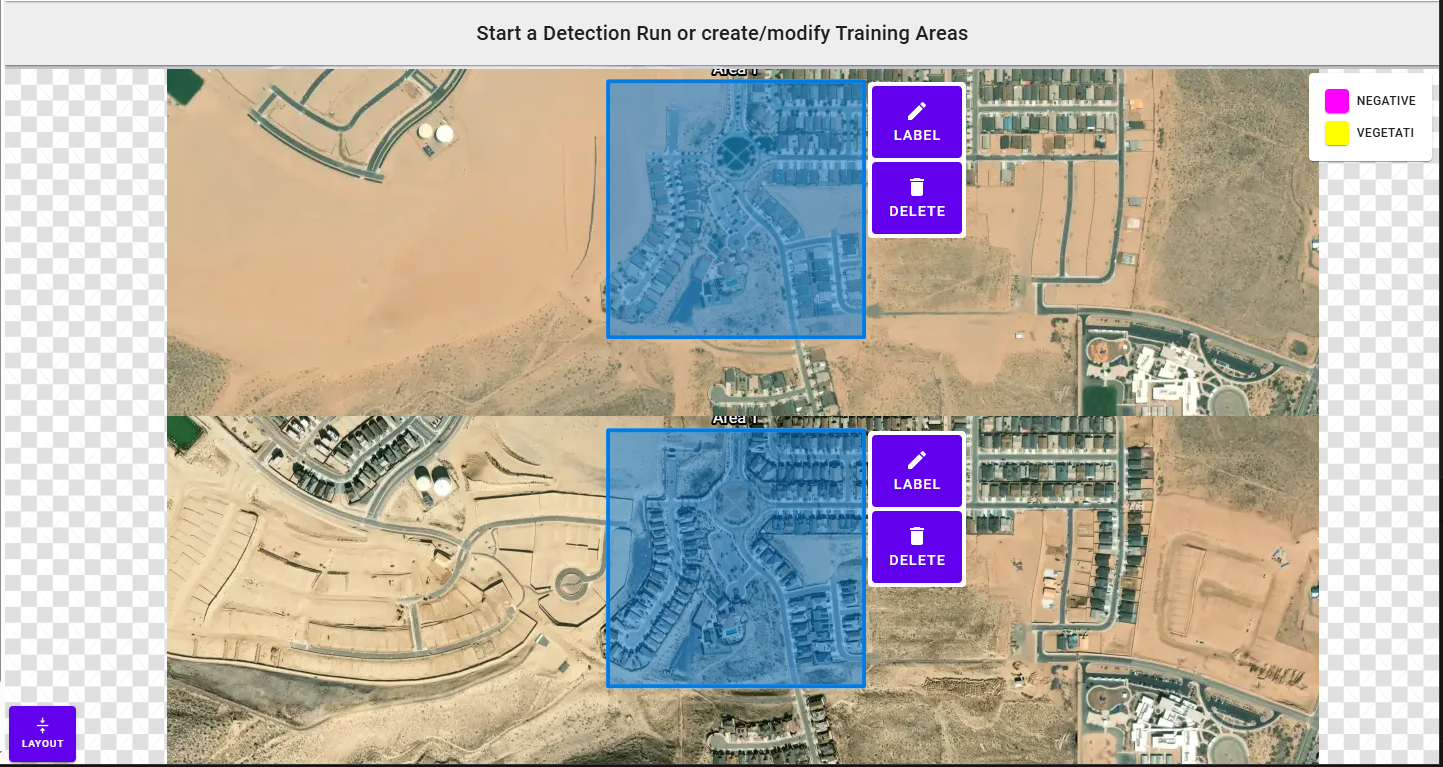
The training area is created on both images in the same place -
Label and train:
- Click the LABEL button that appears on the right side of a training area.
- Label your training area using the toolbar to select classes and tools. See Tips for Best Results for more info.
- Label the features for which you would like to detect changes in the images. You can label these features in either image.
- Click START TRAINING located on the right-hand side of the toolbar or on the preview image to the right to begin training and receive a live preview. It may take a few minutes to allocate the cloud GPU.1
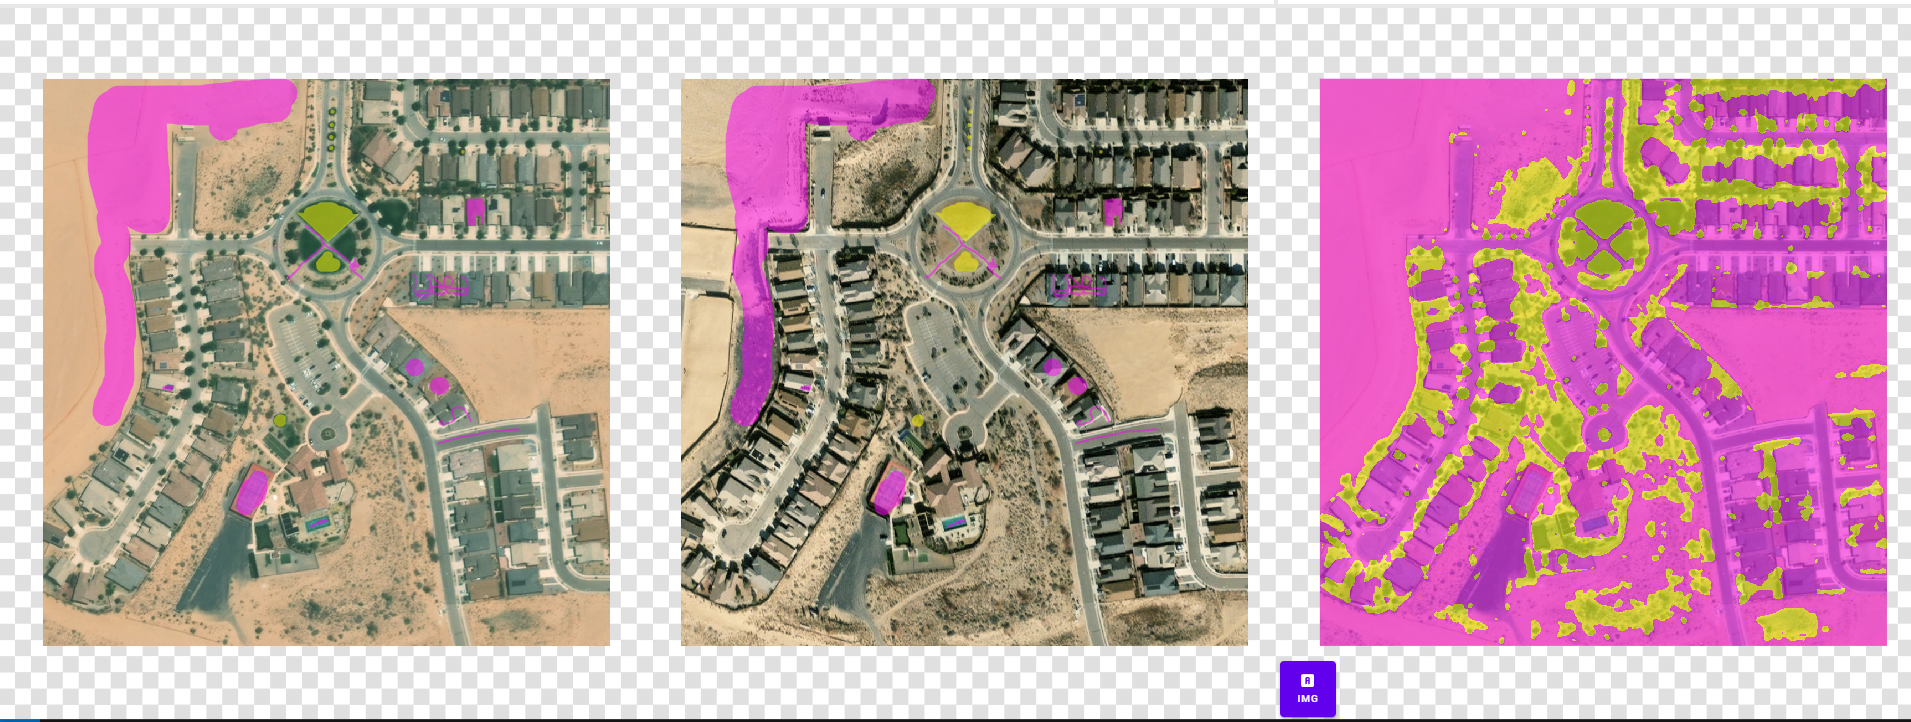
Label and get a preview - When you are happy with the labels and prediction preview, you can stop training with the STOP TRAINING button in the upper right-hand corner of the training preview screen or simply go back to the map and repeat steps 3. and 4. It is best to create and label many training areas before moving on to step 5., optimally across several scenes.
-
Run detection on your scene:
- Click the DETECTION RUN button above the scene to start large-scale detection.
- Click and drag to choose an area and confirm your selection. The selection will automatically select the same place on both images.
- The model will now run detection on the selected area and show the progress along with intermediate results. If you are not satisfied with the intermediate results, you can stop the run by clicking STOP DETECTION RUN in the RESULTS dialogue box to the right and go back to labeling and training.
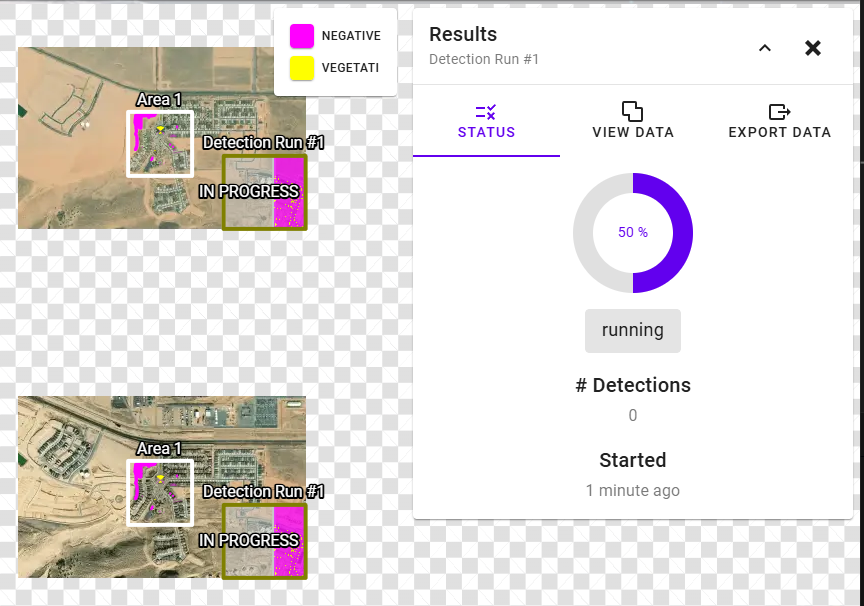
Run detection to find target features -
View stats and export the results:
-
After a detection run, you can view your data by clicking the DATA tab in the RESULTS dialogue box. Choose from a class segmentation mask, a probability mask, model entropy,2 or view detections as vector data with detection centroids, bounding boxes, and polygons.
-
Data from completed runs can be viewed by choosing the run under Previous Detection Runs on the left sidebar.
-
Export and download the data in the formats shown in Input and Export Filetypes.
-
1. Starting training allocates a cloud GPU. Cloud GPUs are started and stopped to conserve resources. If you would like to have an always-on GPU, that can be made available with a change to the subscription, please contact inquiries@blackshark.ai for more information.
2. This shows the amount of entropy associated with the prediction. Clearer borders and lower-entropy areas show a higher degree of certainty. Areas of high entropy are good places to create additional labels.